
Overview
The MIDI studio consists of a single studio space inside the MIDI room teaching facility, equipped with high-end recording equipment and various microphones from producers such as Neumann, Brauner, and Sennheiser. The studio is totally isolated from the MIDI room, but it is possible to use the MIDI room as a live room for recordings, if desired.
The studio desk is centered around two Ghielmetti audio patch bays and a Scarlett Focusrite i1820 AD/DA converter (4th gen). Below you will find a routing diagram demonstrating the system's essentials.

How to connect your laptop and use the Focusrite interface
The MIDI studio does not have a stationary machine, meaning you must bring your own laptop to use the studio. To connect to the audio hardware, simply use the USB-C dongle available at the studio desk. This connects your laptop to the Focusrite Scarlett 18i20 audio interface.
This interface is class-compliant, so you do not need to download any driver if you're a Mac user. However, it is recommended that you download the driver to maintain some control over the internal routing. To get the latest control software, visit this page:
Control software (and drivers) for Scarlett 18i20 (4th Generation): https://downloads.focusrite.com/focusrite/scarlett-4th-gen/scarlett-18i20-4th-gen
To reset the interface to its default settings, download and load this custom snapshot file into the Focusrite Control software: u2-studio-focusrite-control-preset-2025.ff
Monitor outputs 1-2 on the interface are the main outputs. These go straight to the speaker/source selector device. On the speaker selector, you can choose to listen to either a mini-jack audio source or the Scarlett main outputs. To control the monitor level, adjust the monitor volume knob on the Scarlett and(!) the volume knob on the speaker/source selector.
How to setup talkback and monitoring from the MIDI room
For easy monitoring in a recording session in Sound Studio MIDI, simply use the headphone outputs on the Scarlett interface.
For monitoring inside the MIDI room, use the red TIE connectors located in the studio rack and in the MIDI room AV rack. These jack connectors are both accessible from the Ghielmetti patch bay in the studio. Patch the connectors together to connect the two rooms. So Focusrite -> ALTO headphone amp -> TIE connector.
For talkback, use the designated "talkback" button on the Scarlett interface. By default, pressing the "talk" activates the microphone inside the interface and sends the signal to outputs (DA) 3 and 4. Send the talkback signal to the MIDI room via the TIE connectors, as described.

Inside the Focusrite Control software driver, you can choose which output to send the talkback signal to. By default, this should be on Line Outputs 3 and 4.
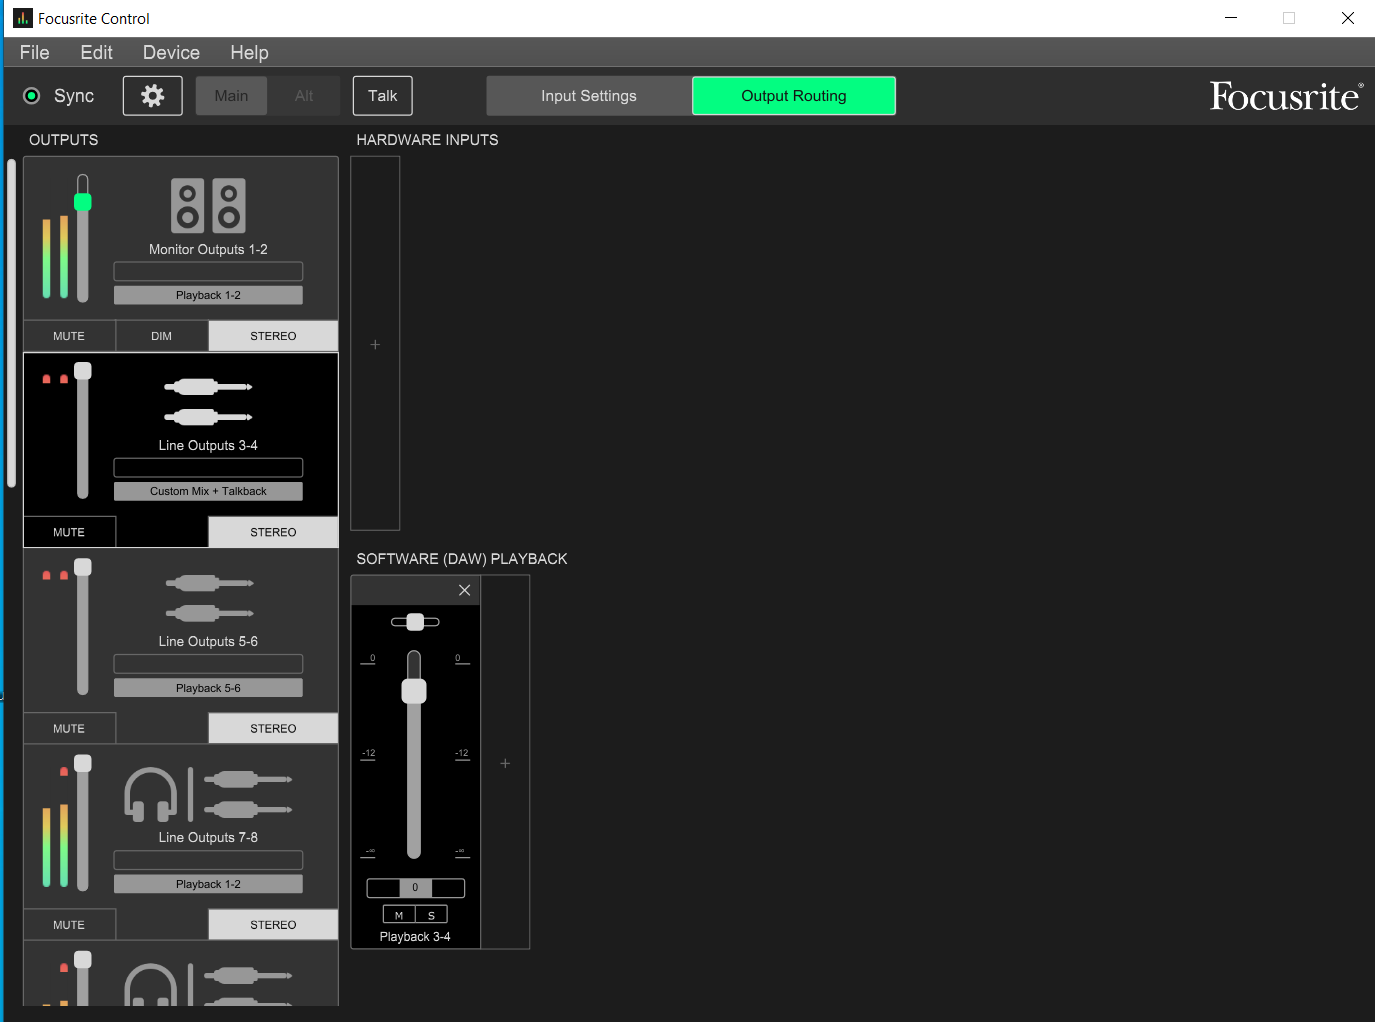
Full I/O routing and Focusrite preset
Download the full studio hardware I/O routing Excel document from here
Download the routing preset for the Focusrite 18i20 AD/DA from here
Microphone inventory
Dynamic
| Name | # | Polar pattern | 48V/power |
|---|---|---|---|
| Shure SM57 | 1 | Cardioid | NO |
| Shure SM58 | 1 | Cardioid | NO |
| Shure SM7B | 2 | Cardioid | NO |
| Sennheiser e906 | 1 | Super-cardioid | NO |
Small diaphragm condensers
| Name | # | Polar pattern | 48V/power |
|---|---|---|---|
| DPA 4090 | 2 | OMNI | YES |
| Neumann KM 184 | 1 | Cardioid | YES |
| Violet Black Finger | 2 | Cardioid | YES |
| Røde NT5 | 2 | Cardioid | YES |
Large diaphragm condensers
| Name | # | Polar pattern | 48V/power |
|---|---|---|---|
| Brauner Phantom Classic | 1 | Cardioid | YES |
| Røde K2 | 1 | Optional | Tube/Custom |
| Shure KSM-44 | 1 | Optional | YES |