
Overview
The facility consists of one live room (samspill 2) and one control room (øverom 3), connected with physical audio connectors and a camera/TV system. Samspill 2 features a variety of recording equipment encased in a big RUFO flight case, a 20-channel XLR/TRS patch panel, and a Sony camera for live streaming. The control room includes state-of-the-art audio equipment for 16-channel ensemble recording and music production capabilities.
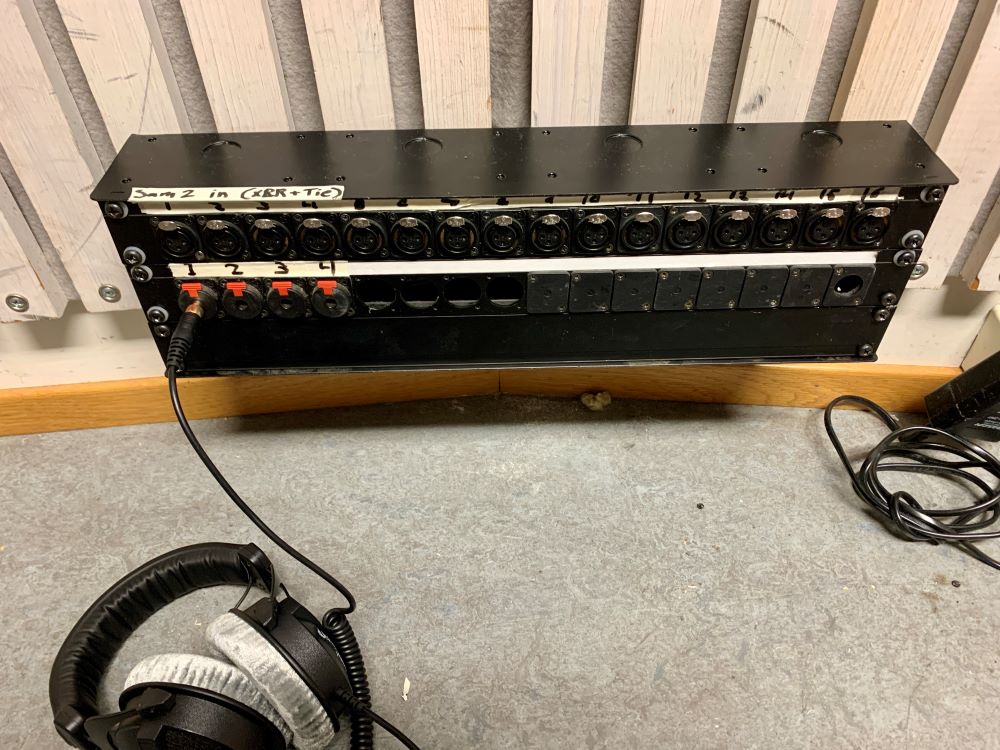
Connect to the control room via the patch inputs in Samspill 2:
At the center of the control room, there is a Focusrite Scarlett 18i20 (3rd Gen) audio interface. To expand the number of physical audio I/O from 8 to 16, a Behringer ADA8200 Ultragain Pro Digital converter is connected to the Scarlett via ADAT.

All available audio hardware input/output and physical connectors are linked together via 2x Ghielmetti patch bays.
How to connect your laptop and use the Focusrite interface
The control room does not have a stationary machine, meaning you have to bring your laptop to use the studio. To connect to the audio hardware, simply use the USB-C dongle available at the studio desk. This connects your laptop to the Focusrite Scarlett 18i20 audio interface.

This interface is class-compliant, so you do not need to download a driver if you're a Mac user. However, it is recommended that you download the driver to control the audio interface. To get the latest control software, visit this page:
Control software (and drivers) for Scarlett 18i20 (3rd Generation): https://downloads.focusrite.com/focusrite/scarlett-3rd-gen/scarlett-18i20-3rd-gen
To reset the interface to its default settings, download and load this custom snapshot file into the Focusrite Control software: u2-studio-focusrite-control-preset-2025.ff
Monitor outputs 1-2 on the Scarlett interface are the main outputs. These go straight to the speaker/source selector device. On the speaker selector, you can choose to listen to either a mini-jack audio source or the Scarlett main outputs. To control the monitor level, adjust the monitor volume knob on the Scarlett and(!) the volume knob on the speaker/source selector.
PS! If you wish to use all inputs on the interface, they will appear in the following order in your DAW;
- Input 1-8: Analogue inputs on the unit,
- Input 9-10: Loopback inputs,
- Input 11-12: S/PDIF inputs,
- Input 13-20: ADAT inputs
How to use the Camera/TV monitor system
The camera/TV system is for visual monitoring of the live room (Samspill 2). In Samspill 2, there is a Sony camera mounted on the ceiling. To enable a direct visual feed to the control room, first turn the camera on and make sure the "SDI Output" setting is set to "HD".

In the control room, turn on the TV and set the input source to HDMI. This should reveal the video feed from Samspill 2.
How to setup talkback and monitoring in Samspill 2
For easy monitoring in a recording session in Sound Studio U2, simply use the headphone output on the Scarlett interface.
For monitoring inside the Samspill 2, use the red TIE connectors located in the studio rack, as well as in on the patch panel in Samspill 2. These connectors are both accessible from the Ghielmetti patchbay in the studio. Patch these connectors together to connect the two rooms. So Focusrite -> ALTO headphone amp -> TIE connector.
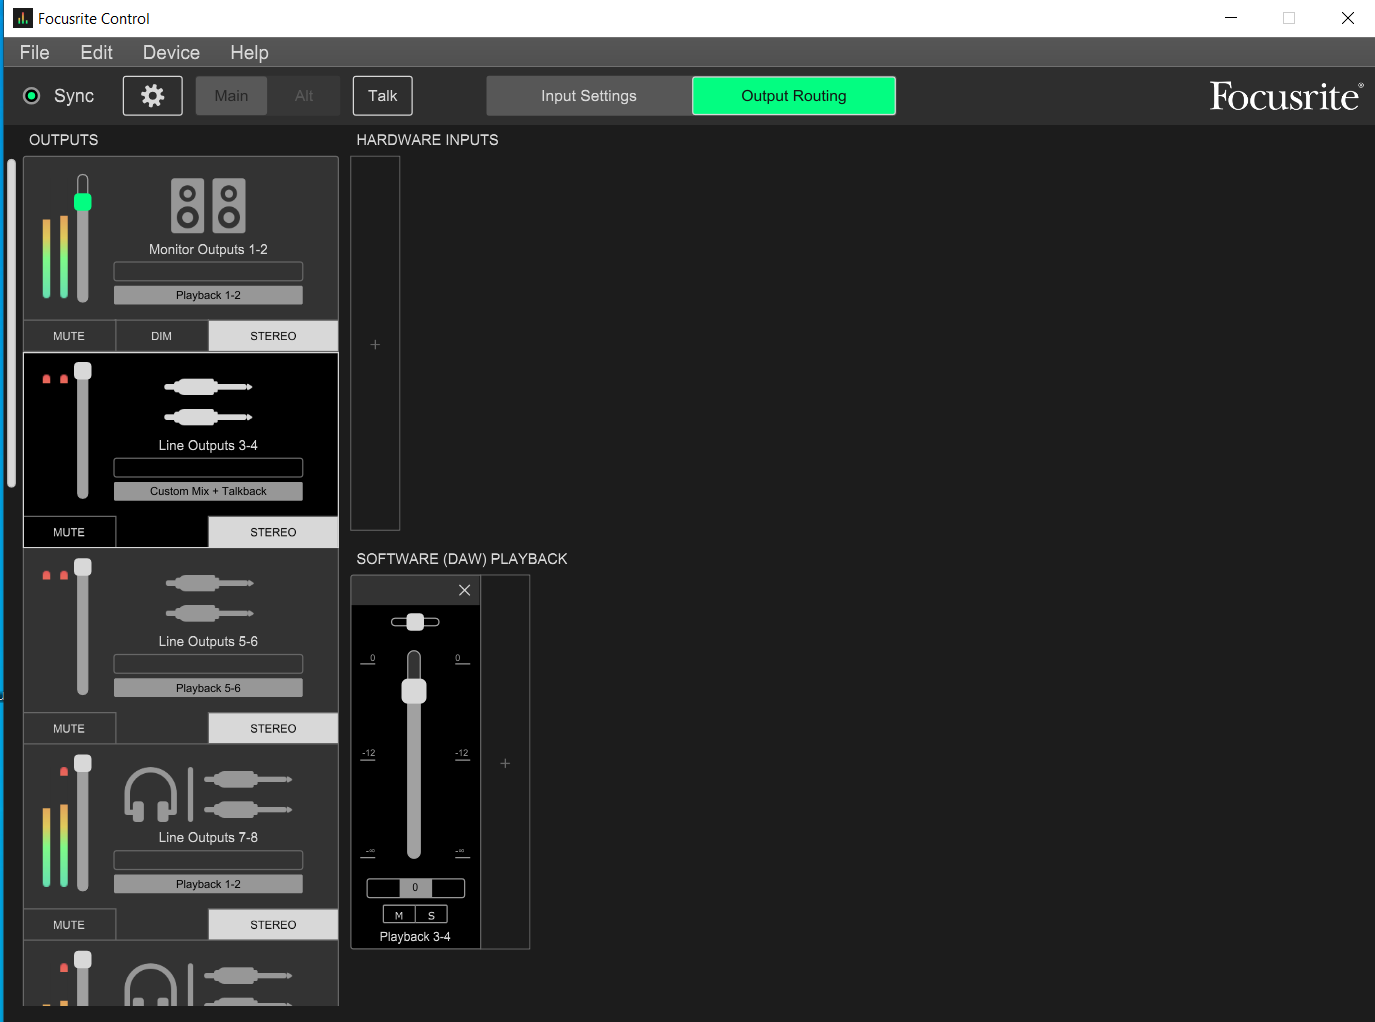
For talkback, use the designated "talkback" button on the Scarlett interface. By default, pressing the "talkback" button activates a microphone inside the Scarlett and sends the signal out to outputs (DA) 3 and 4. Send the talkback signal to Samspill 2 via the TIE connectors, as described.

Inside the Focusrite Control software, we can choose which output on the Focusrite to send the talkback signal. By default, this should be on Line Outputs 3 and 4.
Full I/O routing and Focusrite preset
Download the full hardware IO routing Excel document from here
Download the routing preset for the Focusrite Scarlett 18i20 AD/DA from here
Microphone inventory
Dynamics
| Name | # | Polar pattern | 48V/power |
|---|---|---|---|
| Shure SM57 | 4 | Cardioid | NO |
| Shure SM58 | 2 | Cardioid | NO |
| Shure Beta 52A | 1 | Super-cardioid | NO |
| Shure Beta 91A | 1 | Half-cardioid | NO |
| Sennheiser e604 | 4 | Cardioid | NO |
| Sennheiser e906 | 1 | Super-cardioid | NO |
Small diaphragm condensers
| Name | # | Polar pattern | 48V/power |
|---|---|---|---|
| Shure SM81 | 2 | Cardioid | NO |
Large diaphragm condensers
| Name | # | Polar pattern | 48V/power |
|---|---|---|---|
| AKG C414 | 1 | Optional | YES |