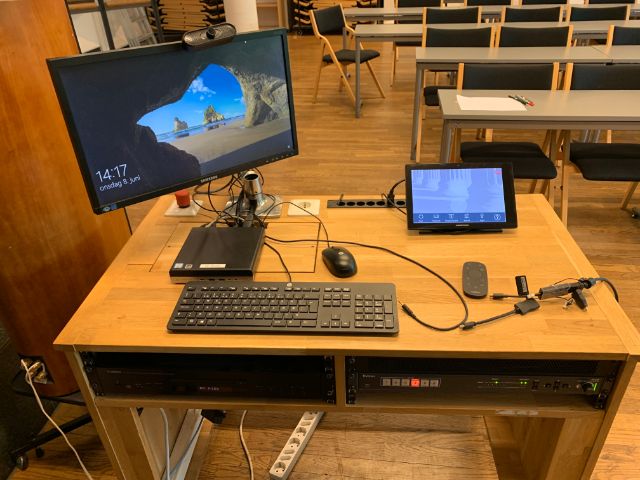
Equipment
- Creston touchpad display
- Stationary PC with Windows 11.
- Projector and screen
- HDMI for connecting a personal laptop
- Includes an adapter for USB-C
- Mini-jack audio connection
- Logitech PTZ Pro 2 web camera and remote controller
- Catchbox microphone receiver box
Turn on the Crestron system simply by interacting with it. This process will take a few minutes. It is important to turn off the system when you leave. The big "Quit" button marks this procedure on the Crestron display.
Video Projection
You can choose between a Laptop HDMI or the PC UiO as the media source for the projector and B&W speakers. This is achieved by navigating to "Projector" on the Crestron Display and selecting the desired source from the menu.
Selecting a media source should trigger the projector to start and the screen to come down automatically.

To use your laptop as a video source, choose the Laptop HDMI option from the Crestron Display and use the designated HDMI cable on the teaching desk. The cable should also include an adapter for USB-C.
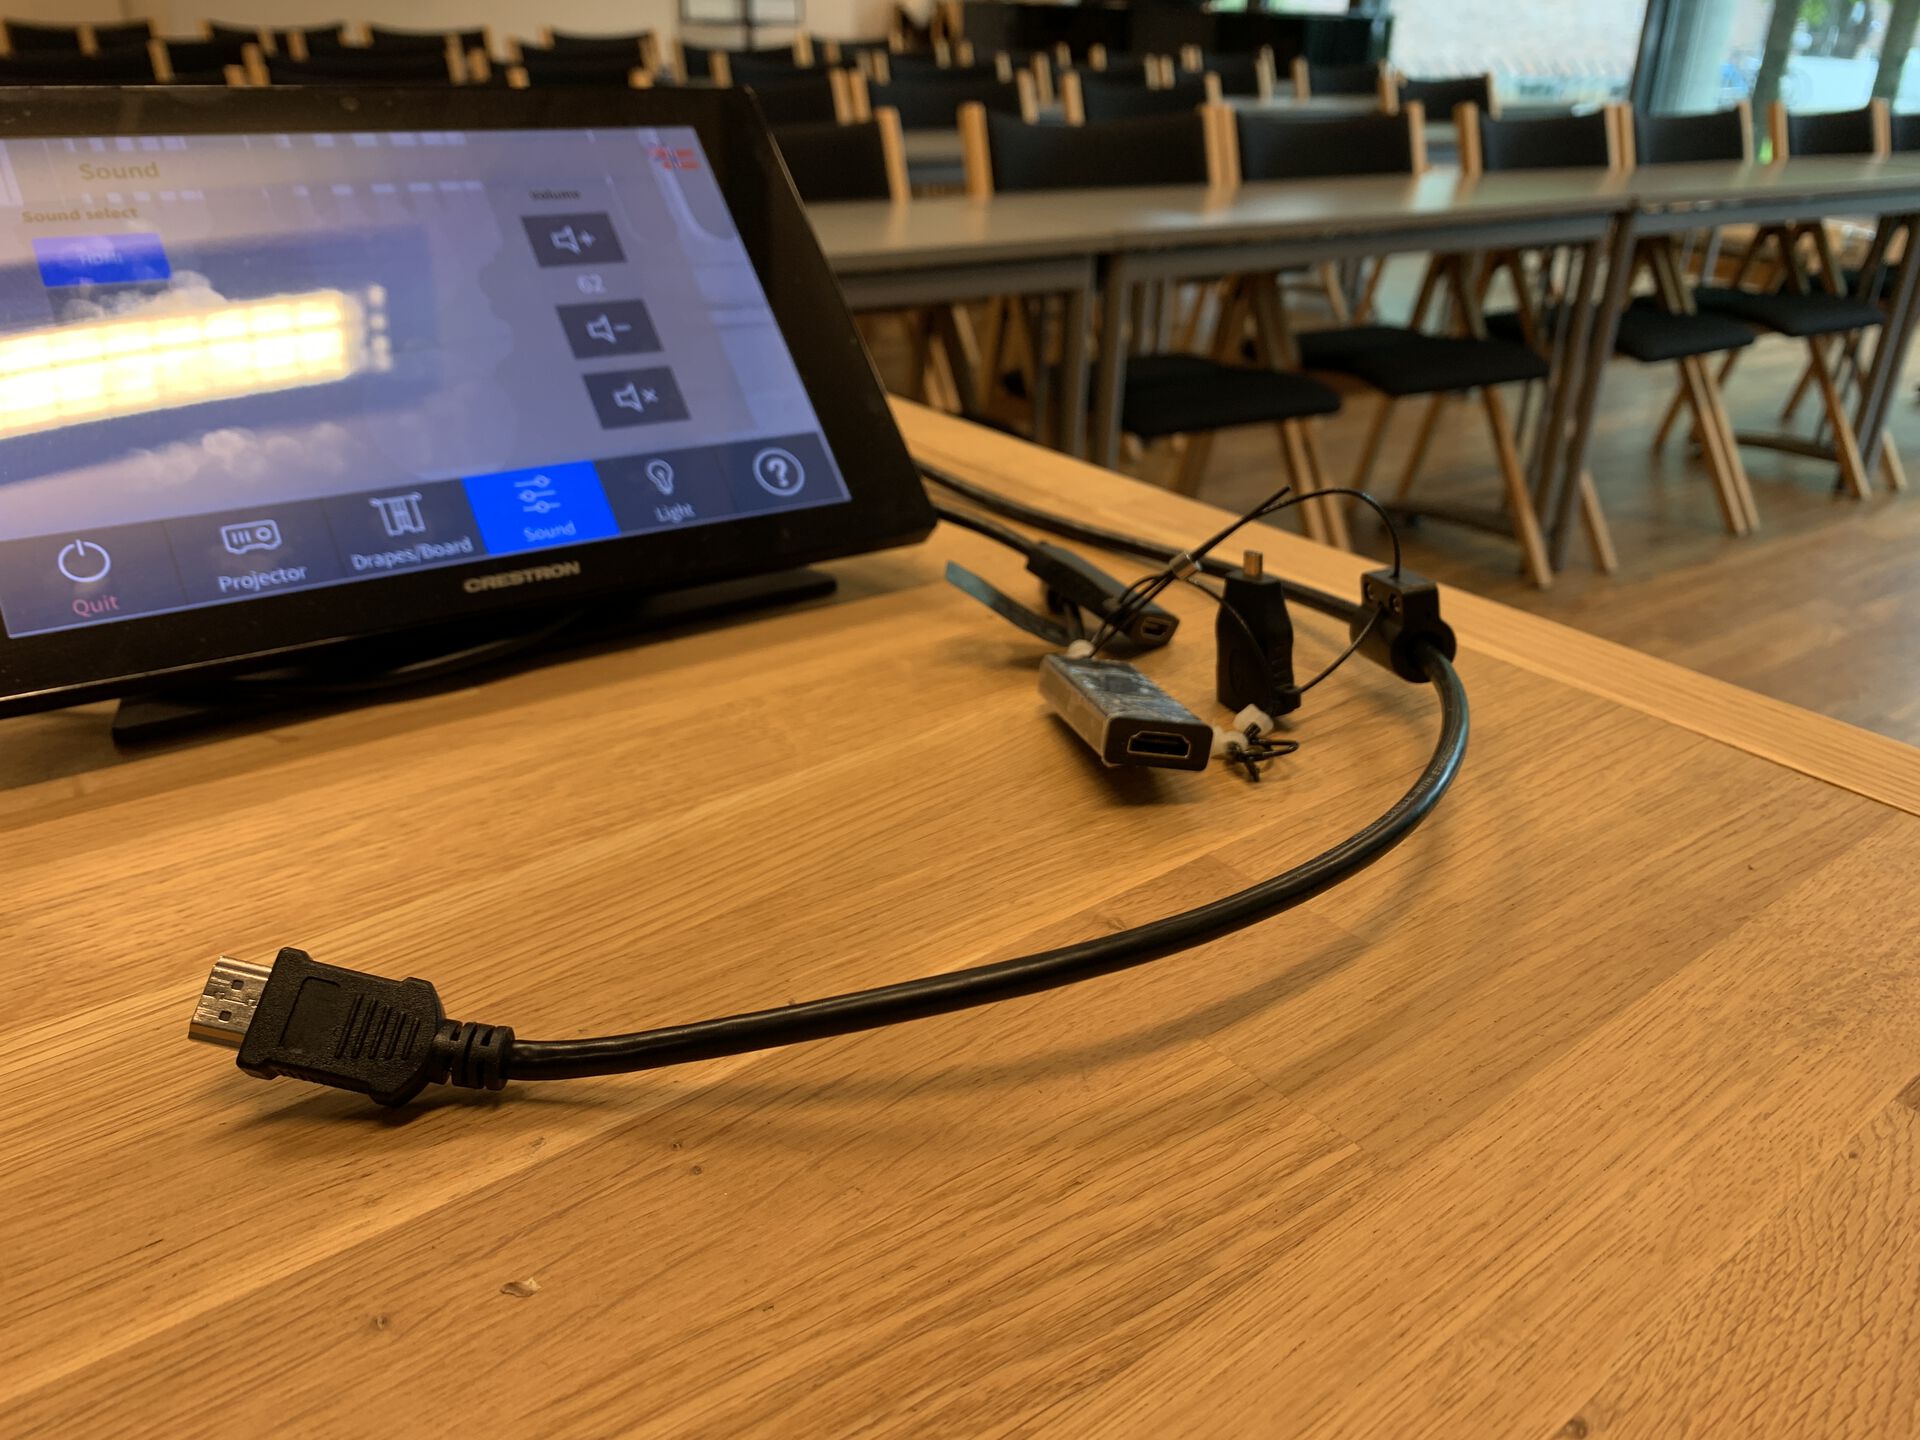
Sound
Sound from the mini-jack cables goes straight to the PA system. Ensure that theXLR cables labelled 1 and 2 that are connected to the MIDAS M-32 mixer are connected directly to the blue output cables that go to the speakers. This is a small hack that we hope to improve in the future.
Also, remember to turn on the PA speakers via the light switch by the entrance door.

Bad Sound?
If you experience crackling sound or generally bad audio quality, there are a few steps you can take.
First, ensure that the "gain-staging" (volumes) of your signal path is properly set. With the HDMI audio option, there are three places where you can adjust the audio volume, including the computer output volume, the Crestron Display volume, and the Crown Amplifier volume located in the rack behind the stage. For the Mini-jack audio option, only the computer output volume and Crown Amplifier volume are relevant. A good rule of thumb is to set all volumes to about 60-80%. From there, increase the volume on your computer first until you are satisfied with the level. This is a good gain-staging strategy.
However, if gain-staging does not work, try to restart your laptop or switch to another machine. Laptops and basic stationary machines don't usually include very advanced audio interfaces and therefore don't produce the best audio quality.
CD and DVD player
Located beside the PC UiO in the teaching desk rack is a Compact Disk player connected to the PC UiO with USB 3.0. The disk player is capable of playing both CDs and DVDs through the computer.

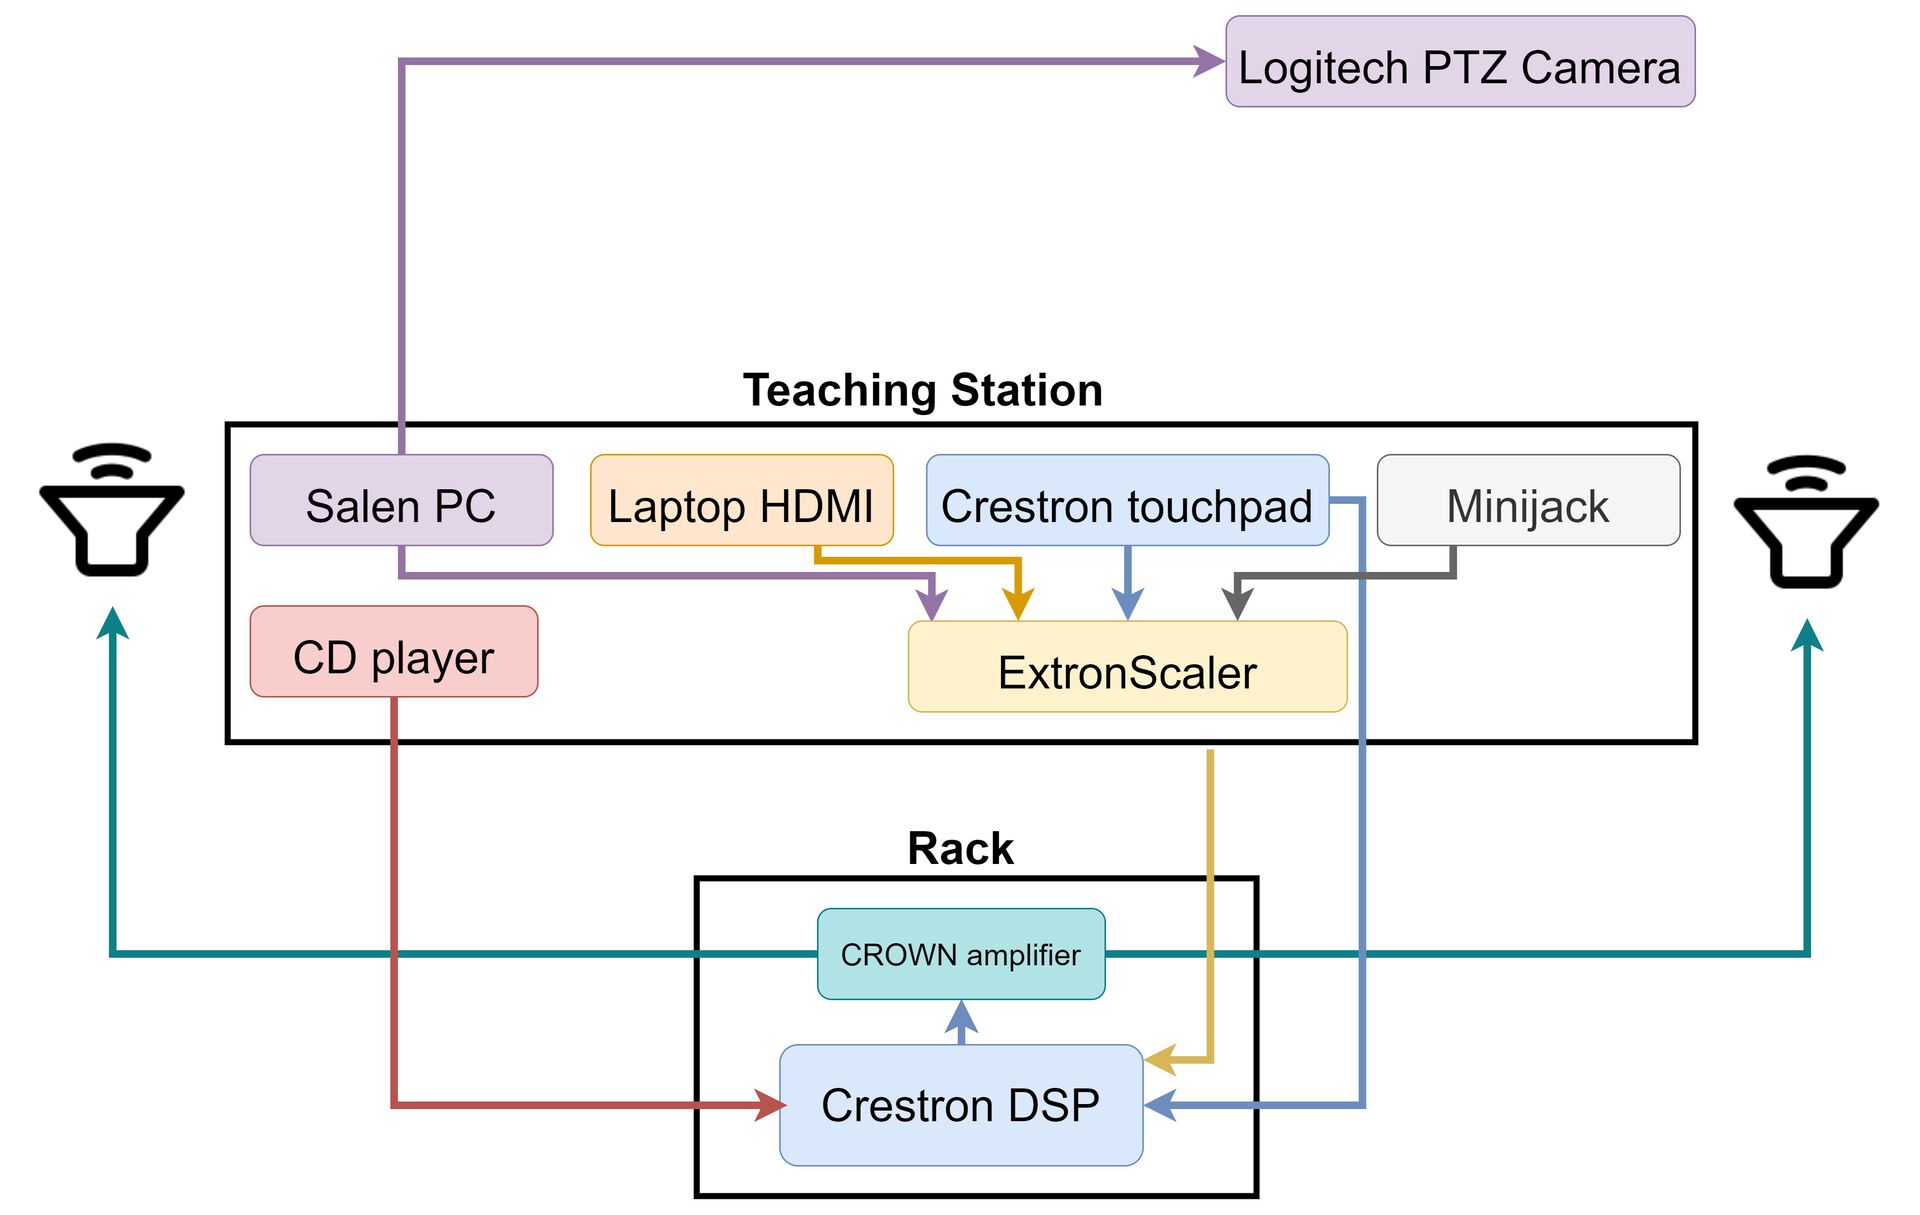
Connection diagram
Underneath you find a visual representation of how the teaching station in Salen is connected together.
Important Notes
- Teaching station - There is no need to interact with the Scaler hardware module located inside the teaching desk at any point. The Crestron display will always override the scaler with the appropriate settings for media playback.