
Equipment
The concert system includes:
- Midas M32 digital mixer
- 2x Renkus-Heinz IC16-R-2 Line Array Loudspeaker Systems
- 1x Renkus-Heinz PN/PNX212-SUB Dual 12-Inch Subwoofers
- 24x input/output patching panel on stage
- 6x wedge monitors for on-stage monitoring
- A selection of microphone stands
- Full concert backline (drumkit, piano, guitar- and bass amps)
- Stage lighting
- Eurolite DMX Move Controller 512 Pro lighting mixer
How To Use The Concert System
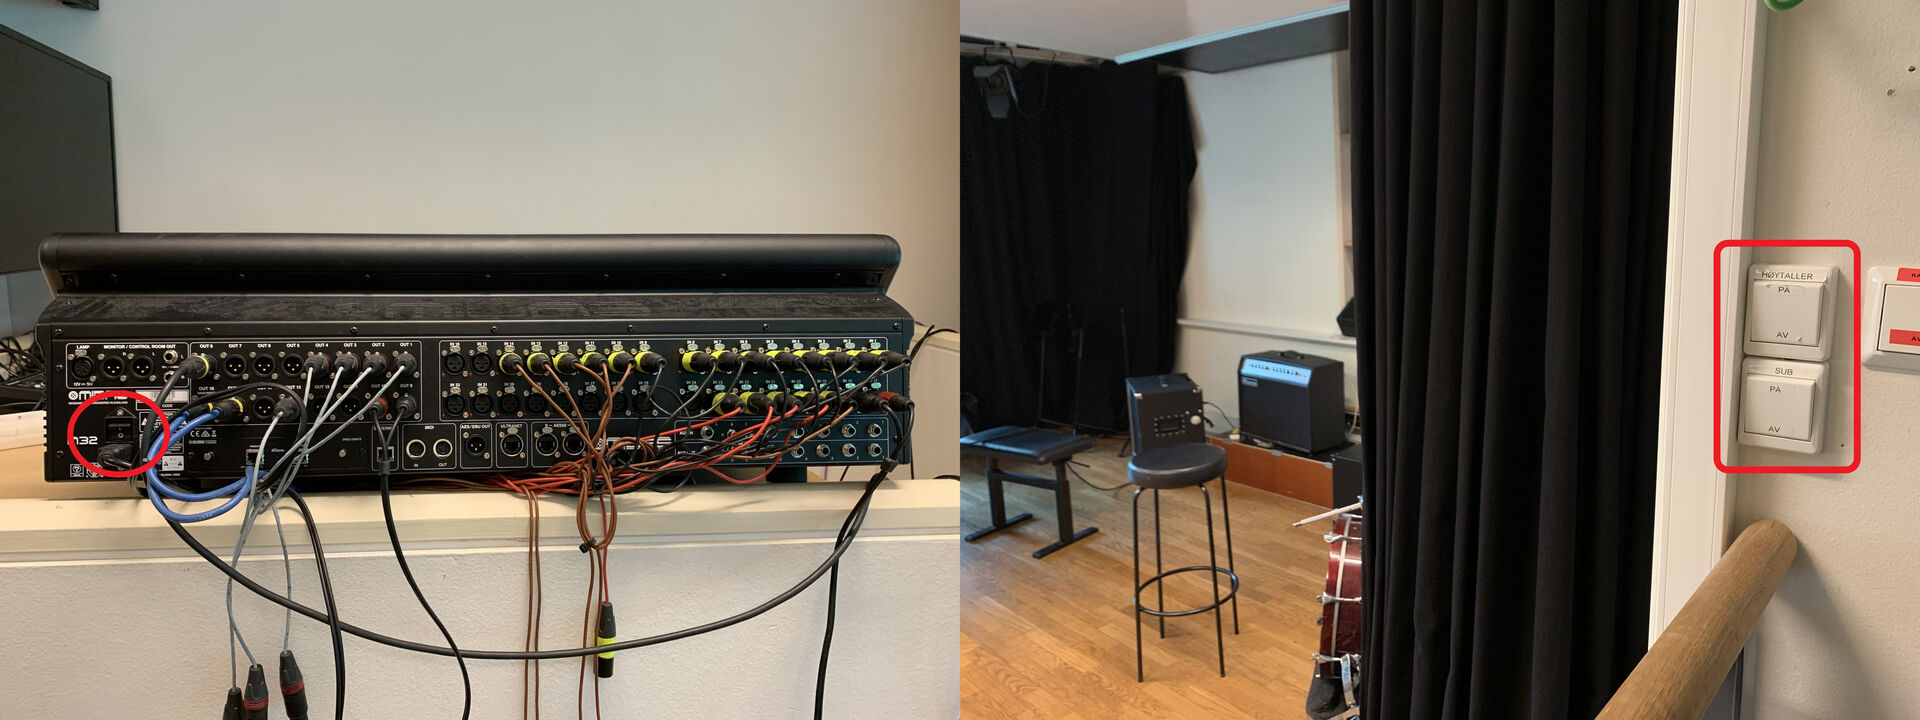
First, turn on the Midas M32 mixer from its rear. Then, turn on the PA via the switches located next to the entrance.
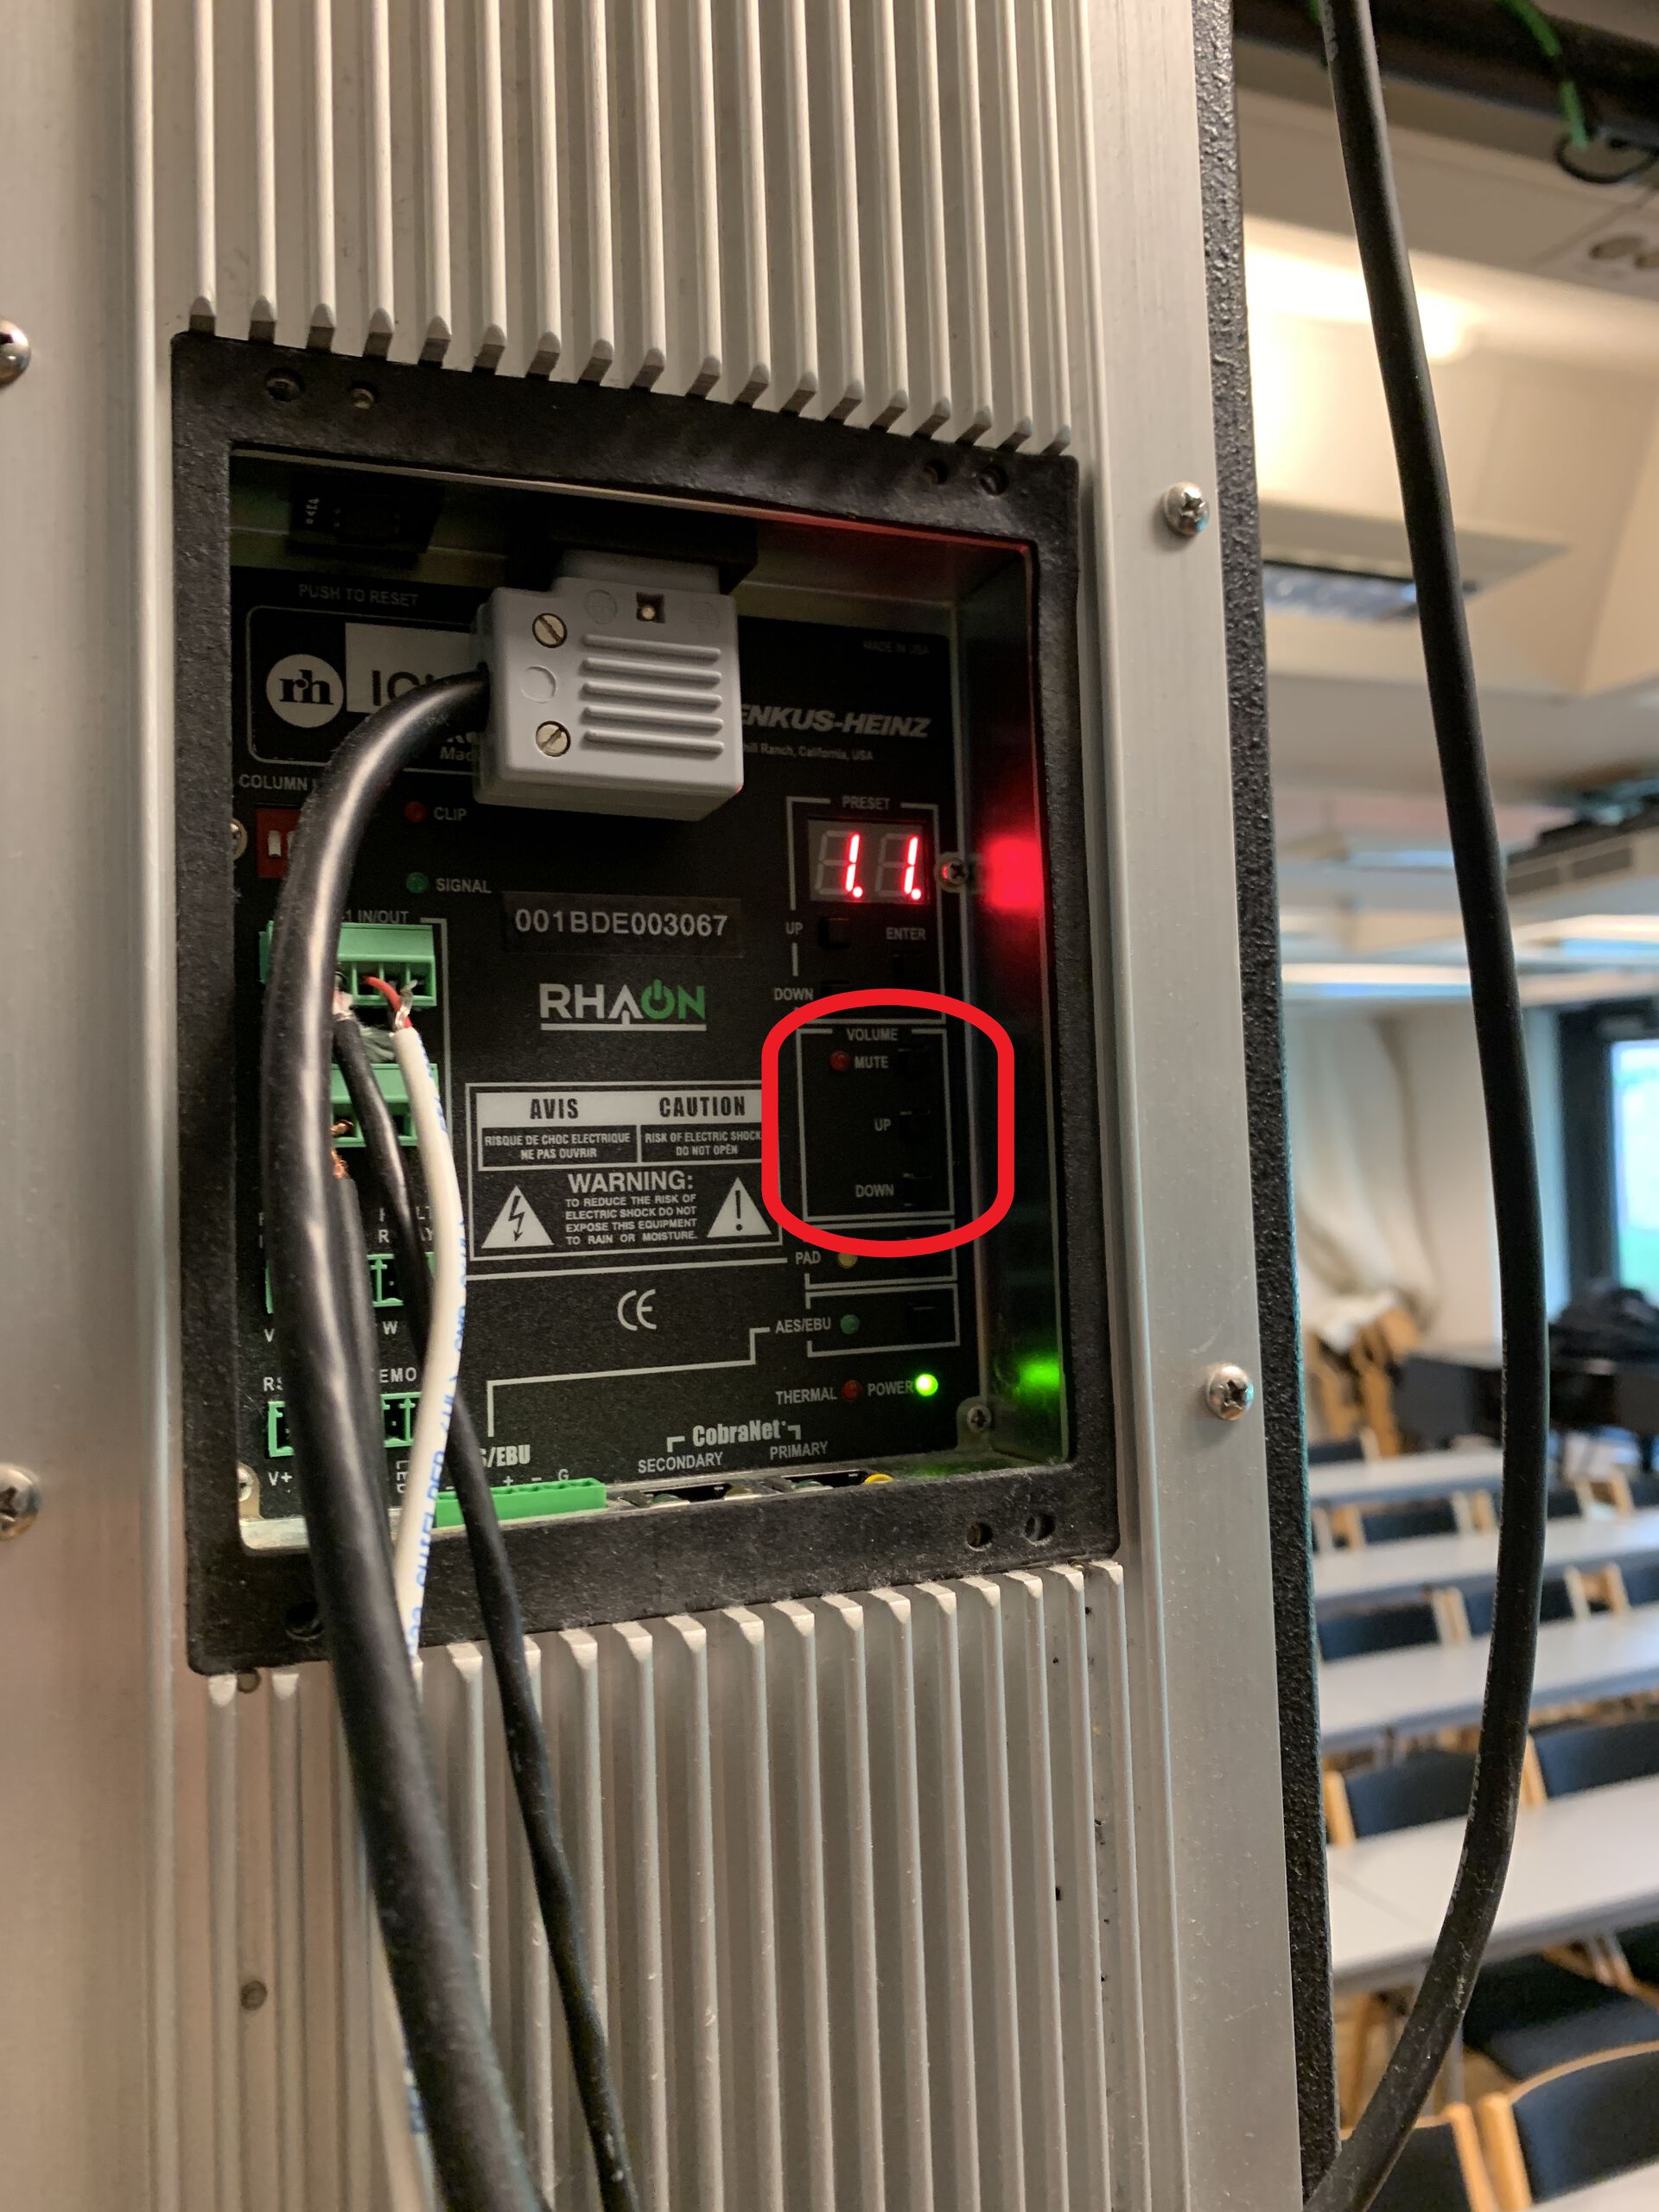
After turning on the PA, make sure that the volume on the speakers are OK. You can change the volume on each speaker from two buttons on the back. Set the volume to around 70/80%.
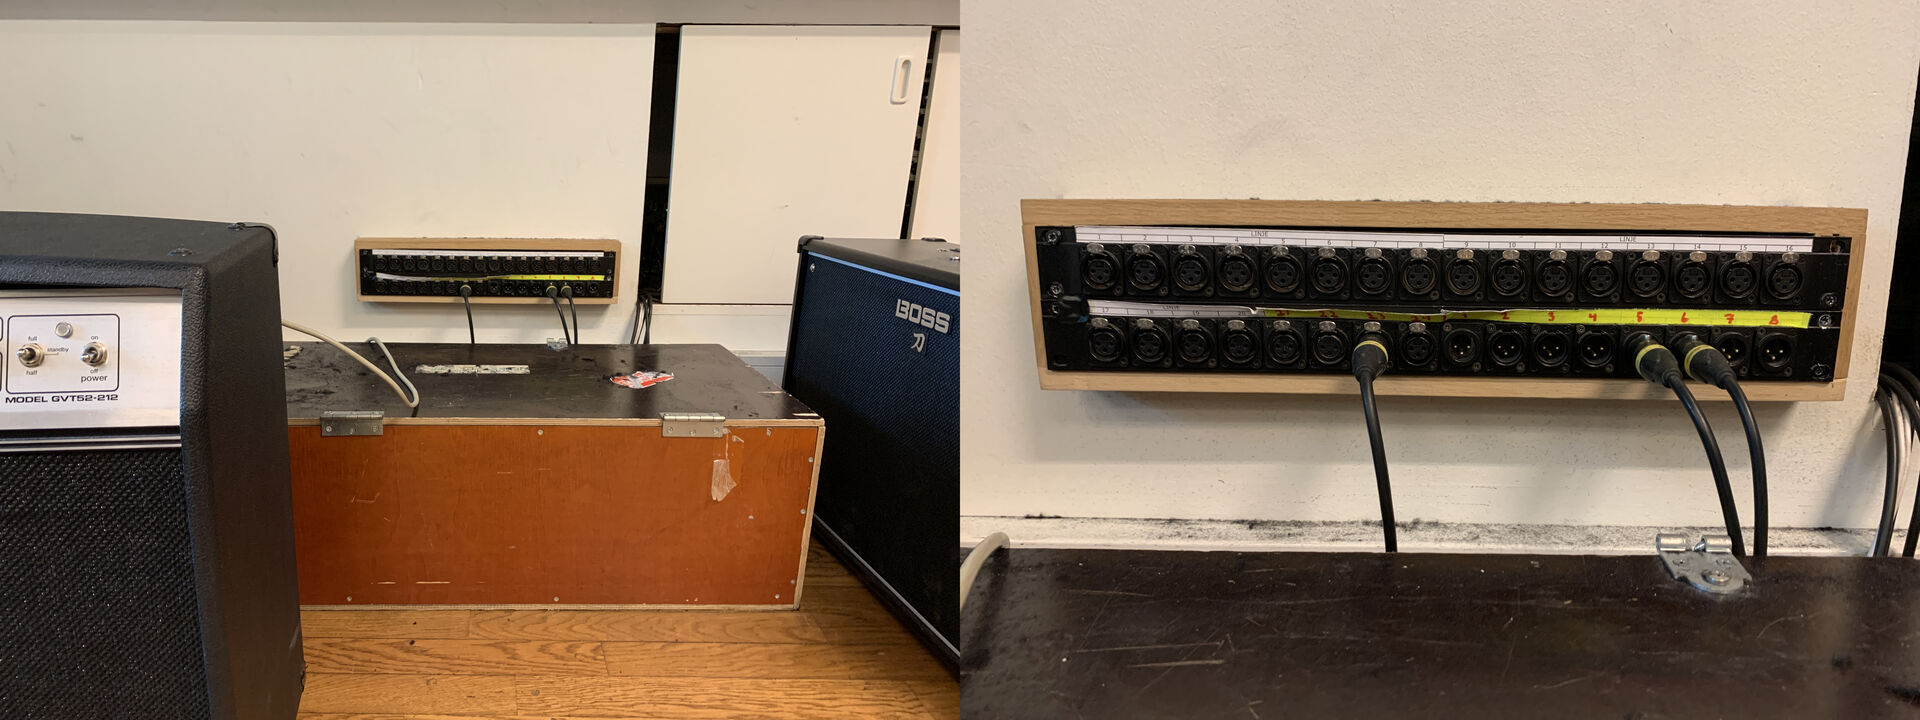
To connect microphones to the Midas mixer, you should use the patching panel located on the wall behind the stage. The patching panel connects directly to the Midas M32 mixer. If the mixer is configured correctly, input 1 on the patch should correspond to input 1 on the mixer. The same goes for the outputs.
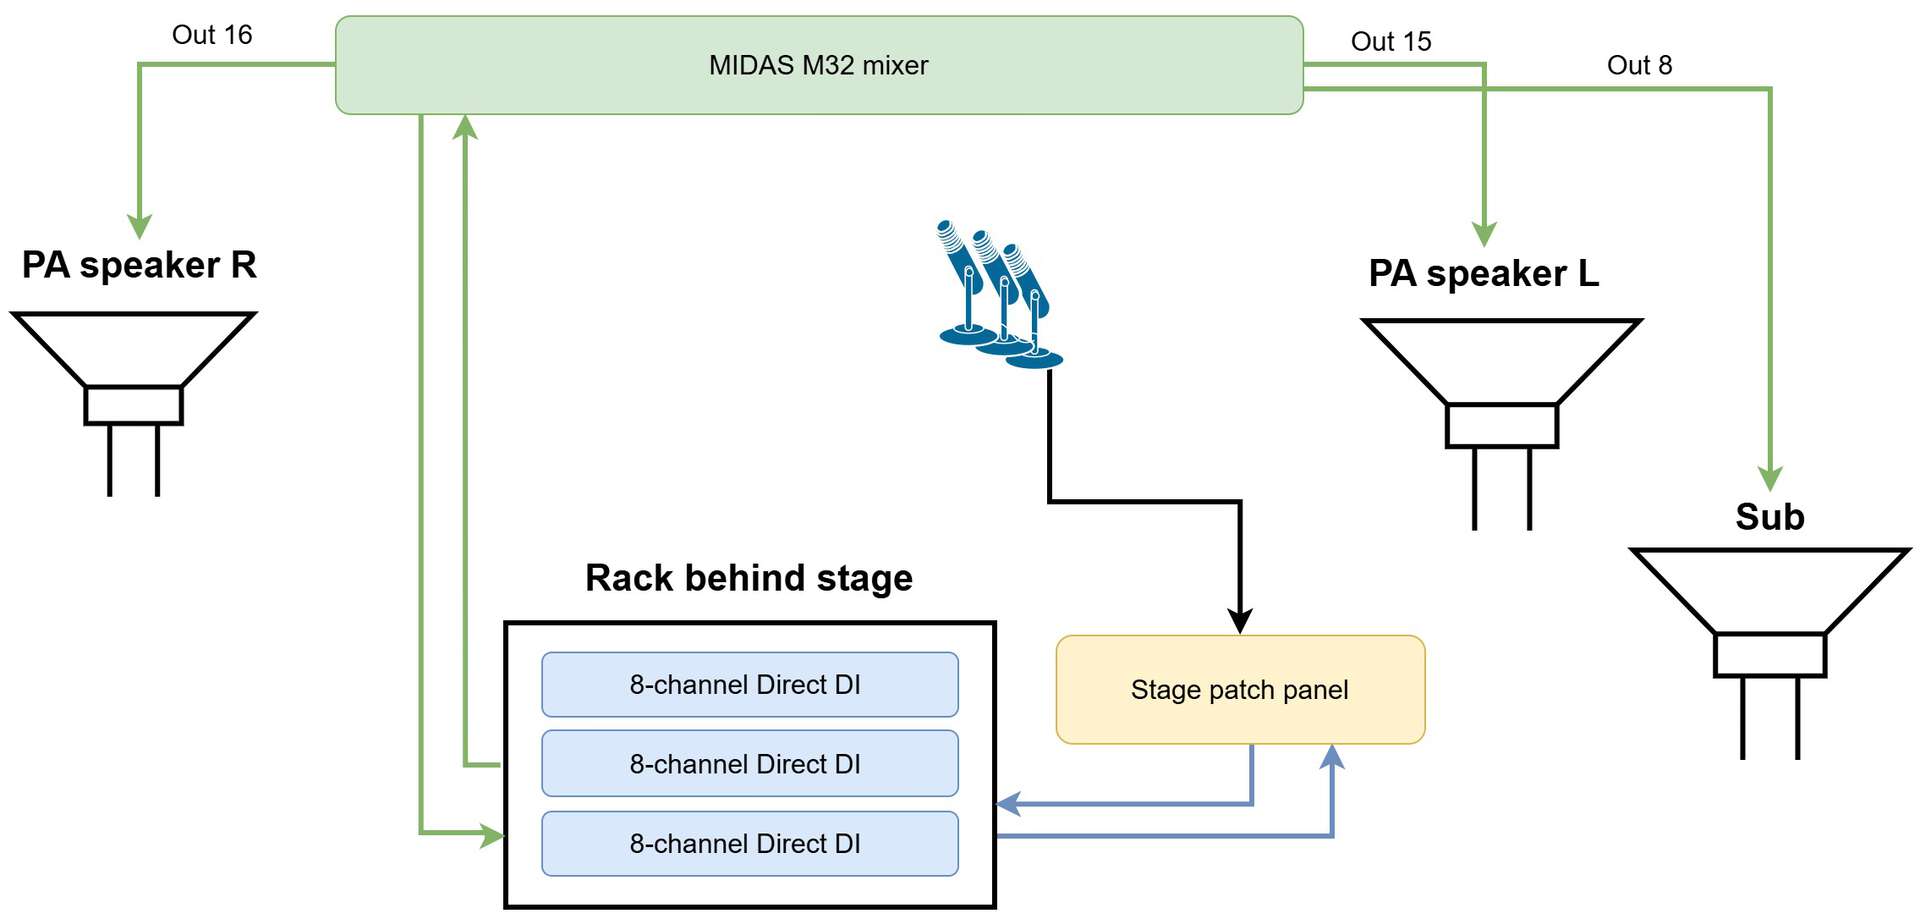
By default, the mixer is connected to the PA speakers via output 15-16, and to the sub via output 8.
Microphones, cables, and instruments are not stored in Salen. To access these, please contact the administration.
Connection diagram
Below, you find a visual representation of how the concert system in Salen is connected.
How To Use The Lighting Mixer
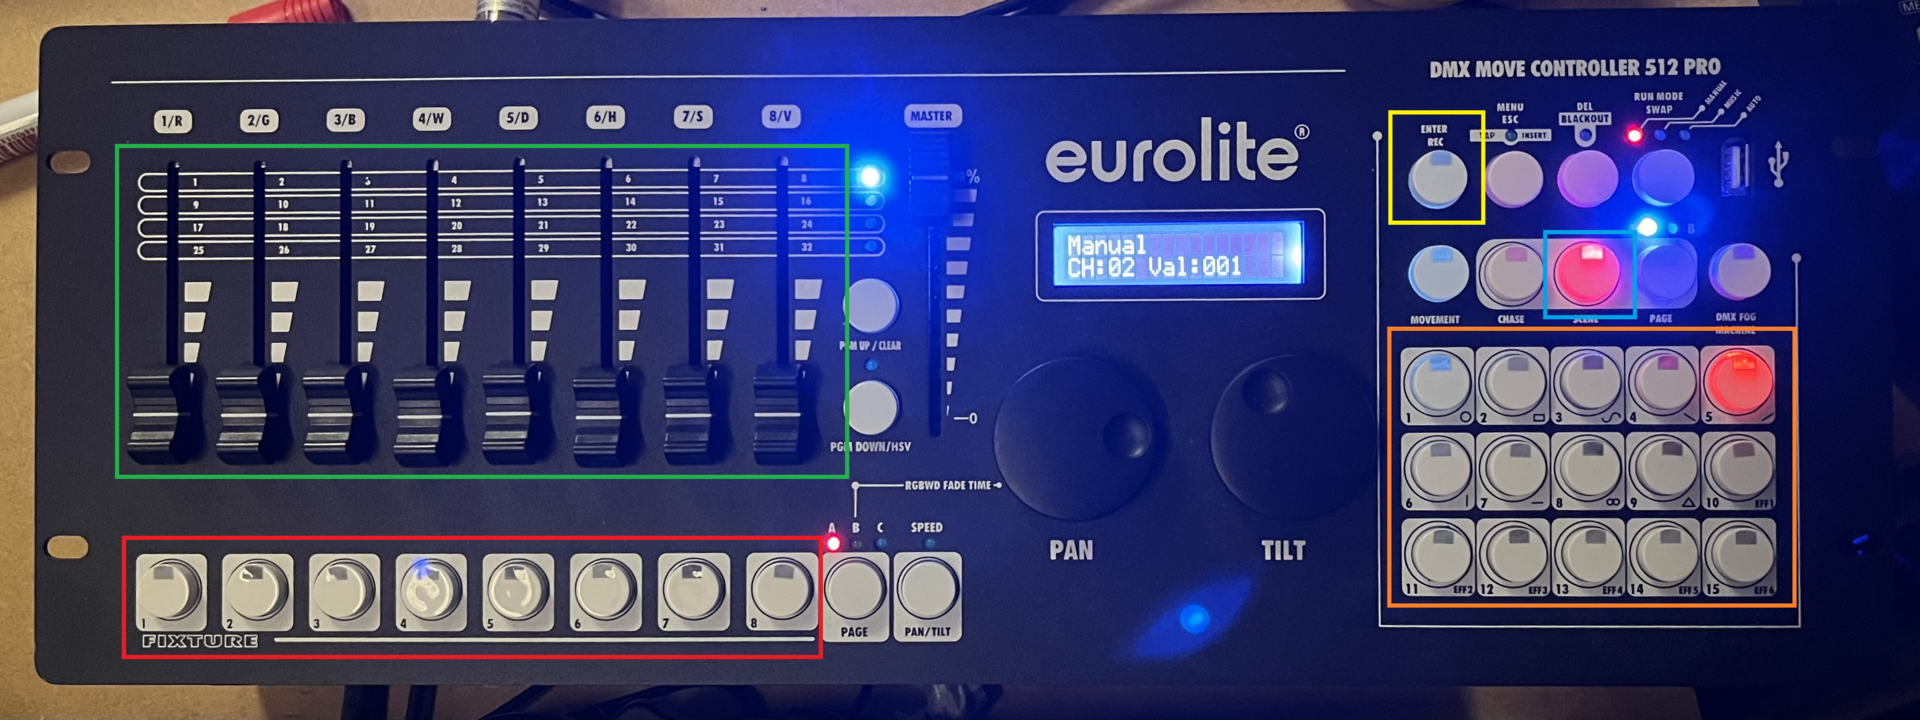
There are lights hanging in the ceiling that can be controlled with the lighting mixer. The on/off switch is at the back of the mixer. The master fader needs to be all the way up for the lights to work.
Editing the Lights
You can edit the individual lights by selecting them with the fixture buttons (highlighted in red). You can select more than one light at a time. Make sure you are on page A.
You change the lights using the faders (highlighted in green). The different faders add different colors in various amounts depending on how high up the fader is. You can add or remove red, green, blue, white, amber and UV color. All of these can be blended to achieve your desired effect.
Scenes
A scene is a predetermined look that can be recalled at any time. You can save scenes to the buttons highlighted in orange to get your desired look by the push of a button.
To make a scene, first press and hold the ENTER/REC button (highlighted in yellow), edit your lights as described earlier, press the ENTER/REC button again and save the scene to one of the buttons. Note: it is important to press and hold the ENTER/REC button first before editing your lights, or else the edits you have done will be reset.
There are already a couple of scenes added from buttons 1 through 5. Make sure you have pressed the SCENE button to access your scenes (highlighted in blue)
Multiple scenes can be active at the same time, which will make the colors add together. Make sure to turn your previous scene off when changing scene if you don't wish to have this effect.